

Buying, assigning, renewing, and releasing numbers are admin-only. Supervisors can view numbers and their details and rename them.
Buy a number
1
Start the purchase
Go to Calls → Numbers and select Buy number. The Buy a New Number dialog opens.
2
Choose the type and location
Under What type of number do you need?, pick a Type, such as Local, Mobile, or Toll-free. The types on offer depend on the country. Then choose a Country and, where asked, a State and City. Leave Any city to search the whole country.
3
Check availability
Select Check Availability. TalkChief shows a Number Available card with the One-time setup fee and the Monthly Cost.
4
Submit registration details if asked
Some countries show Registration Required. Before you can use the number, you must provide proof of a local address and a valid ID. Fill in the required fields, choose a Document Type, and select Upload Document. Each file can be up to 2 MB. Select Next to continue.
5
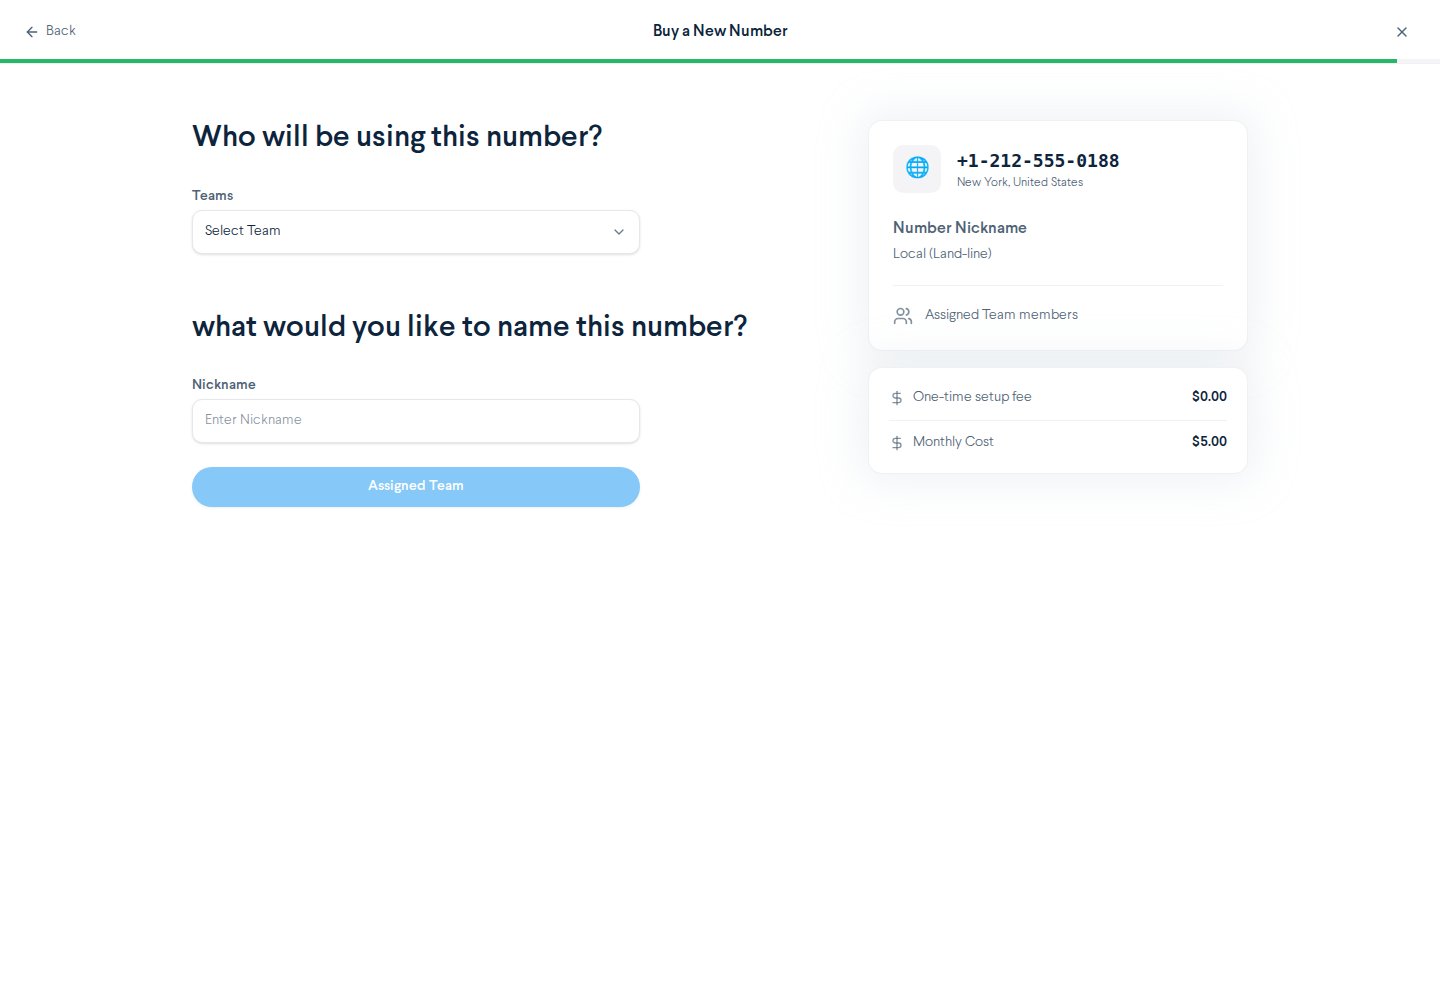
Assign and name the number
Under Who will be using this number?, pick a team. Under what would you like to name this number?, enter a Nickname, such as “Main line”. Confirm the purchase.
Manage your numbers
Each number appears as a card with its nickname, status, and assigned team. Use the search box (Search number, name or team) and the status filters (All, Active, Pending, High spam) to find one. Open a number’s actions menu to:Assign numbers to a team
You can also manage numbers from the team’s page.1
Open the team
Go to Team → Teams & Members, then select Manage Team on the team card.
2
Add numbers
Open the Numbers tab and select Assign Numbers. Pick the numbers to add and select Assign.
3
Choose the default number
In a number’s Actions menu, select Make Default. To take a number away from the team, select Remove from this Team.
Set the caller ID
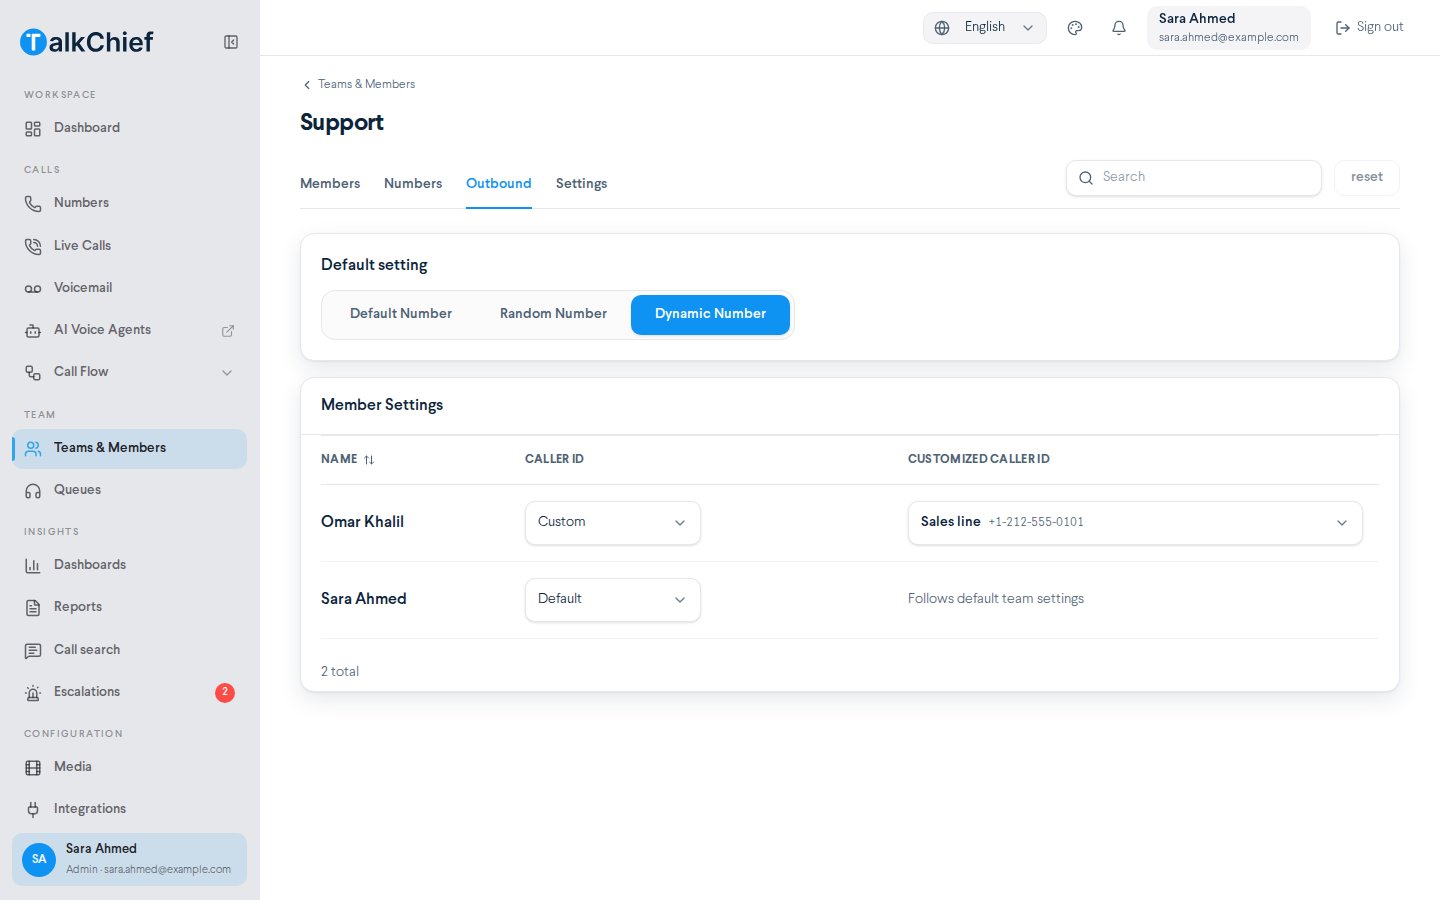
Caller ID is the number people see when your team dials out. You set it on each team’s Outbound tab.1
Open the team's Outbound tab
Go to Team → Teams & Members, select Manage Team, then open Outbound.
2
Choose the team default
Under Default setting, pick one option. Unavailable options are grayed out.
3
Override for a member if needed
Under Member Settings, set a member’s Caller ID to Custom. Then choose a number under Customized Caller ID. Members left on Default show Follows default team settings.
4
Save
Select Save. Select reset to undo unsaved changes.
Frequently asked questions
Why can't I select Random Number?
Why can't I select Random Number?
The team needs at least three assigned numbers. Assign more numbers on the team’s Numbers tab, then try again.
Can a member always call from the same number?
Can a member always call from the same number?
Yes. On the team’s Outbound tab, set the member’s Caller ID to Custom and pick the number.
What does the High spam filter show?
What does the High spam filter show?
It lists numbers flagged as high spam risk. Open Details to see the number’s Spam Score.
Related pages
Call flows
Decide what happens when someone calls your number.
Teams and members
Create teams and invite the members who use your numbers.