

You need a TalkChief admin or supervisor account and a free slot under your plan’s AI agent limit. To place outbound calls, create a campaign instead.
Create the agent
1
Open Inbound agents
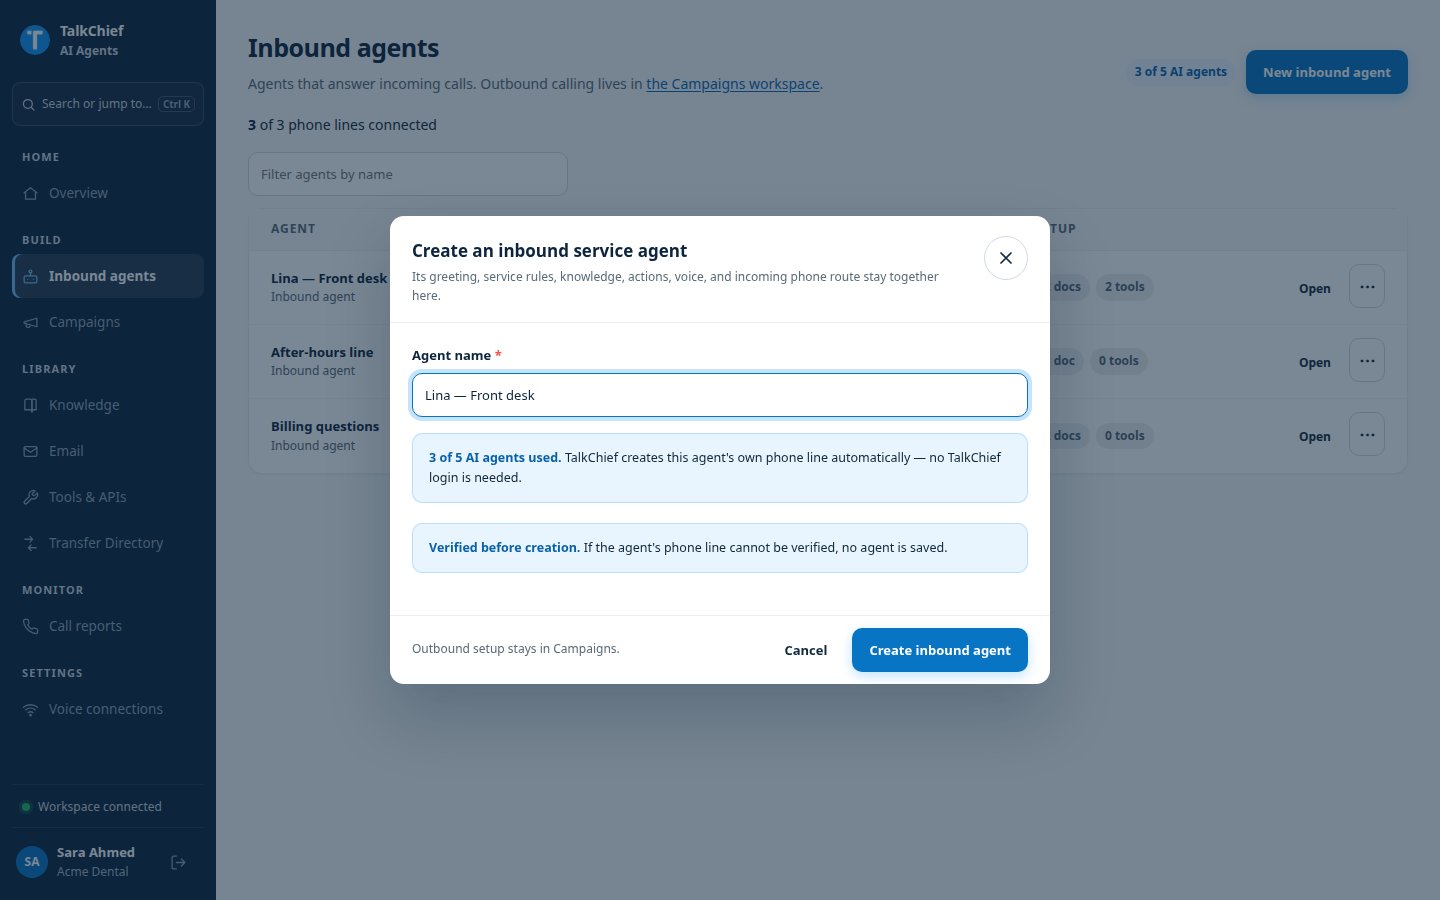
In the agents workspace, click Inbound agents, then New inbound agent.
2
Name the agent
In Agent name, enter a name your team will recognize, for example “Maya — customer care”.
3
Create it
Click Create inbound agent. TalkChief creates the agent’s own phone line and checks it. If the line cannot be verified, no agent is saved.
Set the persona
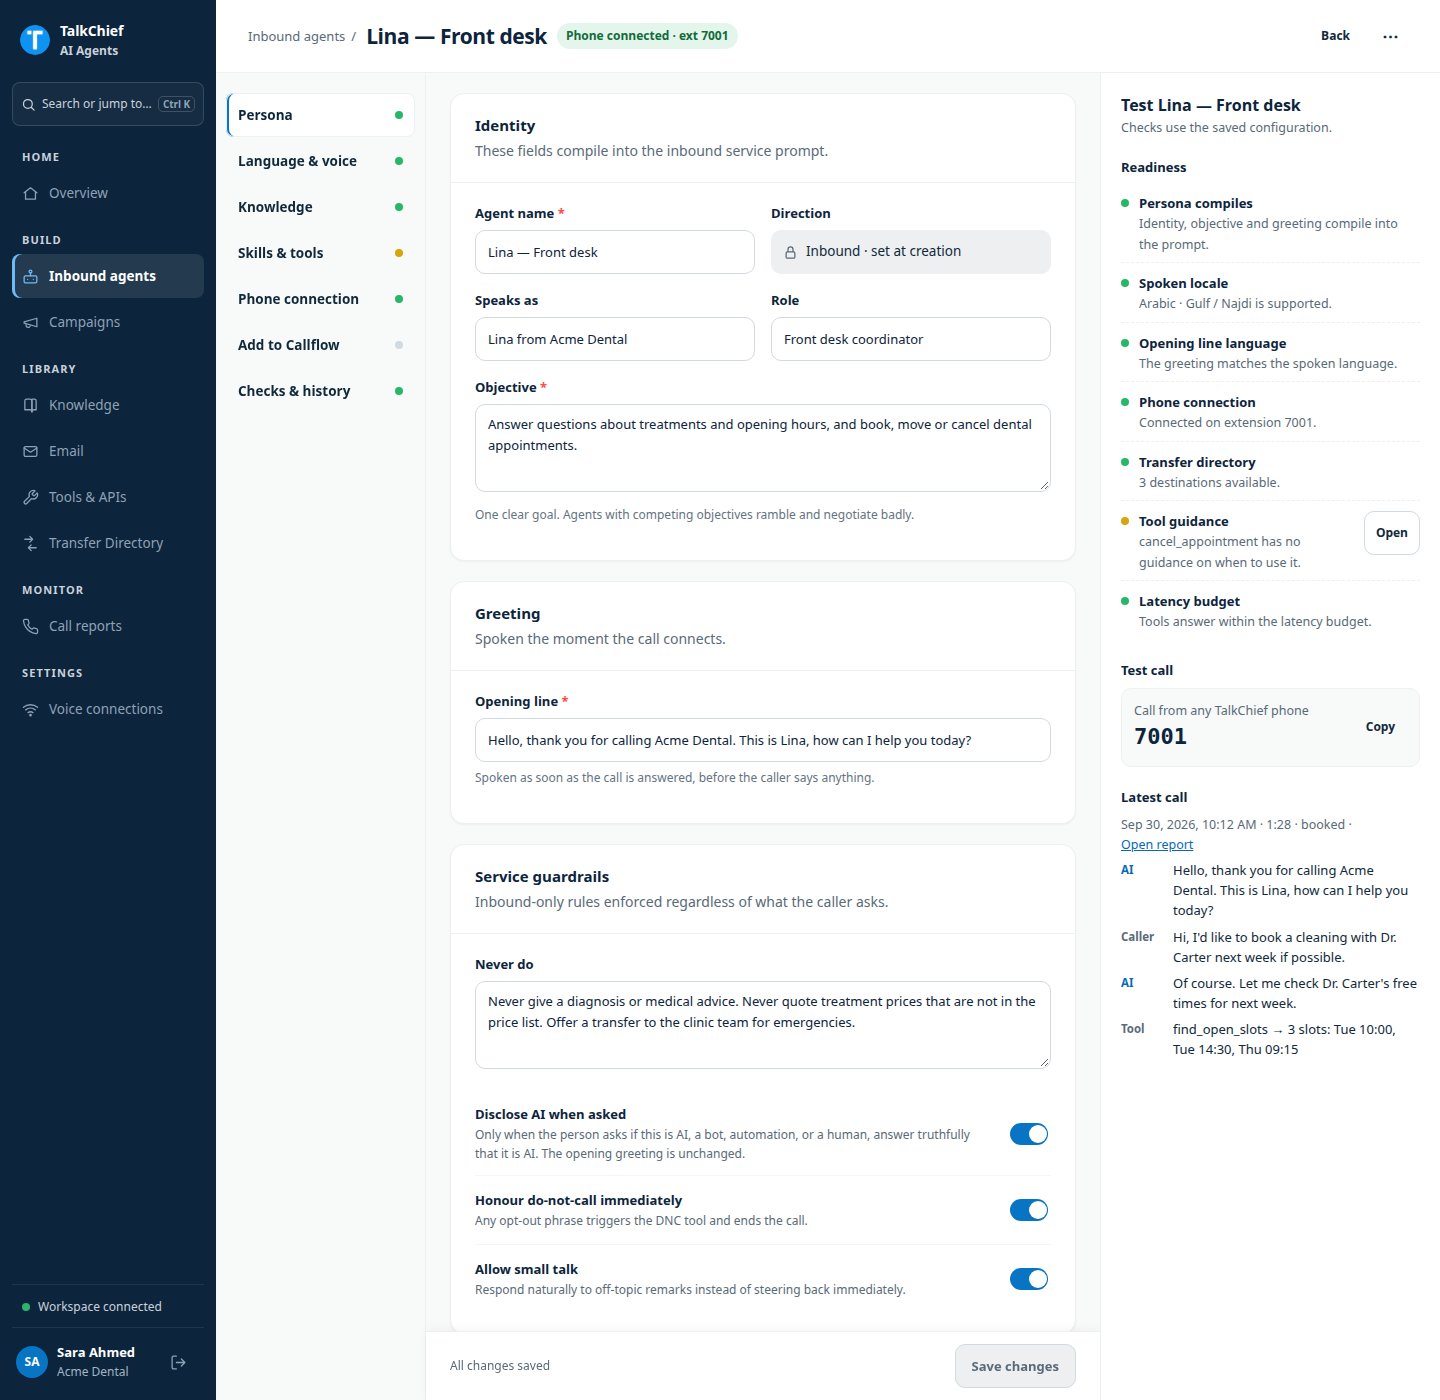
Open Persona.
Then choose the service guardrails:
- Disclose AI when asked: if the caller asks whether this is AI or a person, the agent answers truthfully.
- Honour do-not-call immediately: an opt-out phrase records the request and ends the call.
- Allow small talk: the agent replies naturally to off-topic remarks before returning to the task.
Choose language and voice
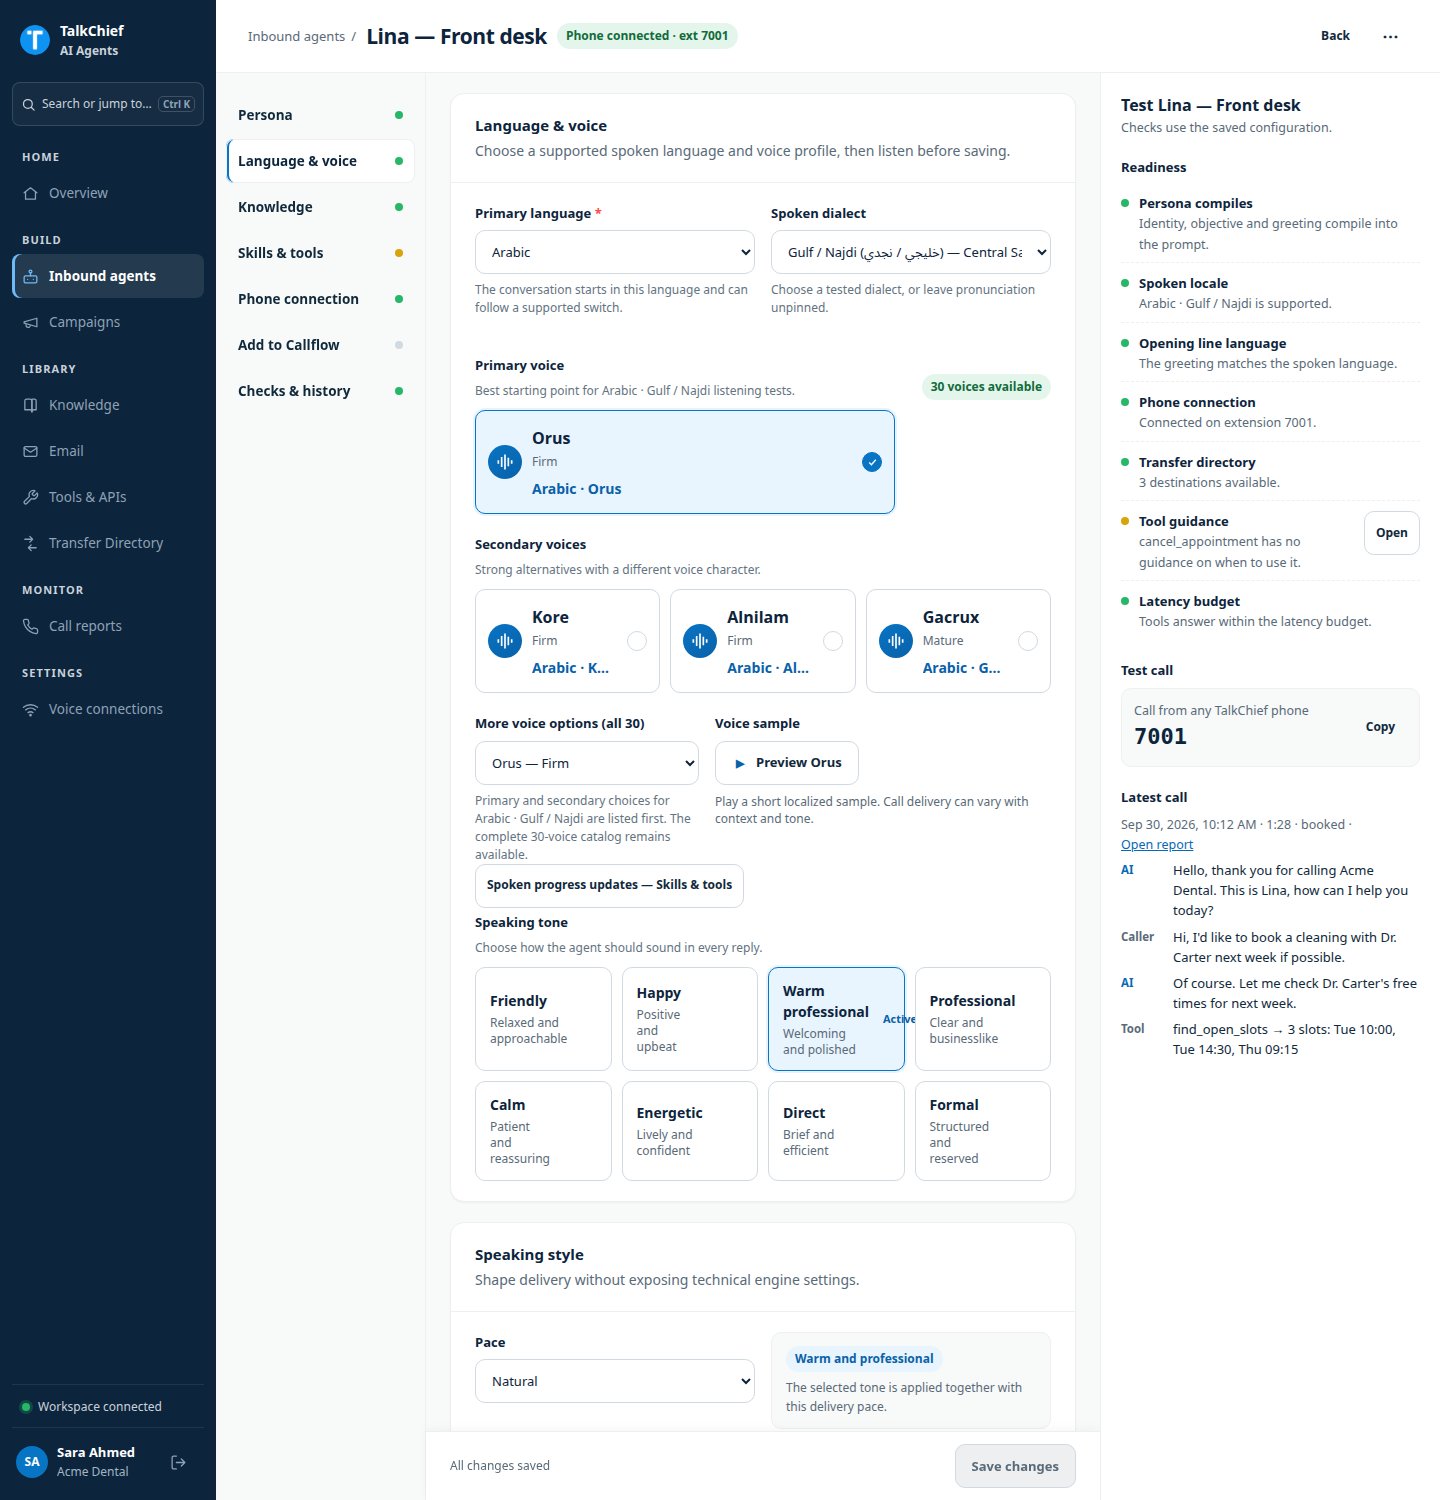
Open Language & voice.1
Pick the language
In Primary language, choose English, Arabic, Hebrew, or Auto-detect.
2
Pick the dialect
In Spoken dialect, choose how the agent should sound. English offers American and British. Arabic offers Egyptian, Gulf / Najdi, Shami / Levantine, and Modern Standard. Hebrew offers Conversational Israeli.
3
Pick a voice
Choose the Primary voice or one of the Secondary voices. To see all 30 voices, open More voice options (all 30).
4
Listen before you save
Use Voice sample to hear the selected voice in the selected language.
5
Pick a speaking tone
Choose one: Friendly, Happy, Warm professional, Professional, Calm, Energetic, Direct, or Formal.
Speaking style and timing
Save your changes
Click Save changes at the bottom of the editor. New calls use the saved settings right away. There is no separate publish step for inbound agents. To undo unsaved edits, click Discard.Next steps
After the persona and voice, finish the setup in this order:- Grant documents in Knowledge.
- Turn on tools in Skills & tools.
- Grant transfer destinations.
- Add the agent to a call flow and place a test call.
FAQ
Which language should I choose if my callers speak several?
Which language should I choose if my callers speak several?
Choose Auto-detect to let the agent follow the caller. Pick a fixed language if most callers use one, because some features, such as spoken progress updates, need a primary language.
Can I change the voice later?
Can I change the voice later?
Yes. Change it in Language & voice and click Save changes. The next call uses the new voice.
How do I delete an agent?
How do I delete an agent?
Open the agent, click the more actions menu (⋯), then Delete agent…. TalkChief disconnects its phone line first. Existing call reports and transcripts stay available. If a call flow still uses the agent, remove that step first.
Related pages
Knowledge base
Give the agent approved documents.
Tools and integrations
Let the agent look things up and take actions.