

Single sign-on is available on the Professional plan. You need a TalkChief admin account, an Okta admin account, and access to your domain’s DNS settings.
How it works
Once SSO is on, people on your verified email domains see a Sign in with your company option on the TalkChief login page. TalkChief sends them to Okta, Okta confirms who they are, and they come back signed in. Okta controls who can sign in: only people assigned to the TalkChief app in Okta get through. The first time an existing TalkChief member signs in through Okta, TalkChief links their Okta account to their member by email address. Their extension, numbers, devices and history stay as they are.Step 1: Start the setup in TalkChief
1
Open Single sign-on
In the TalkChief web app, go to Settings and select Single sign-on.
2
Create the connection
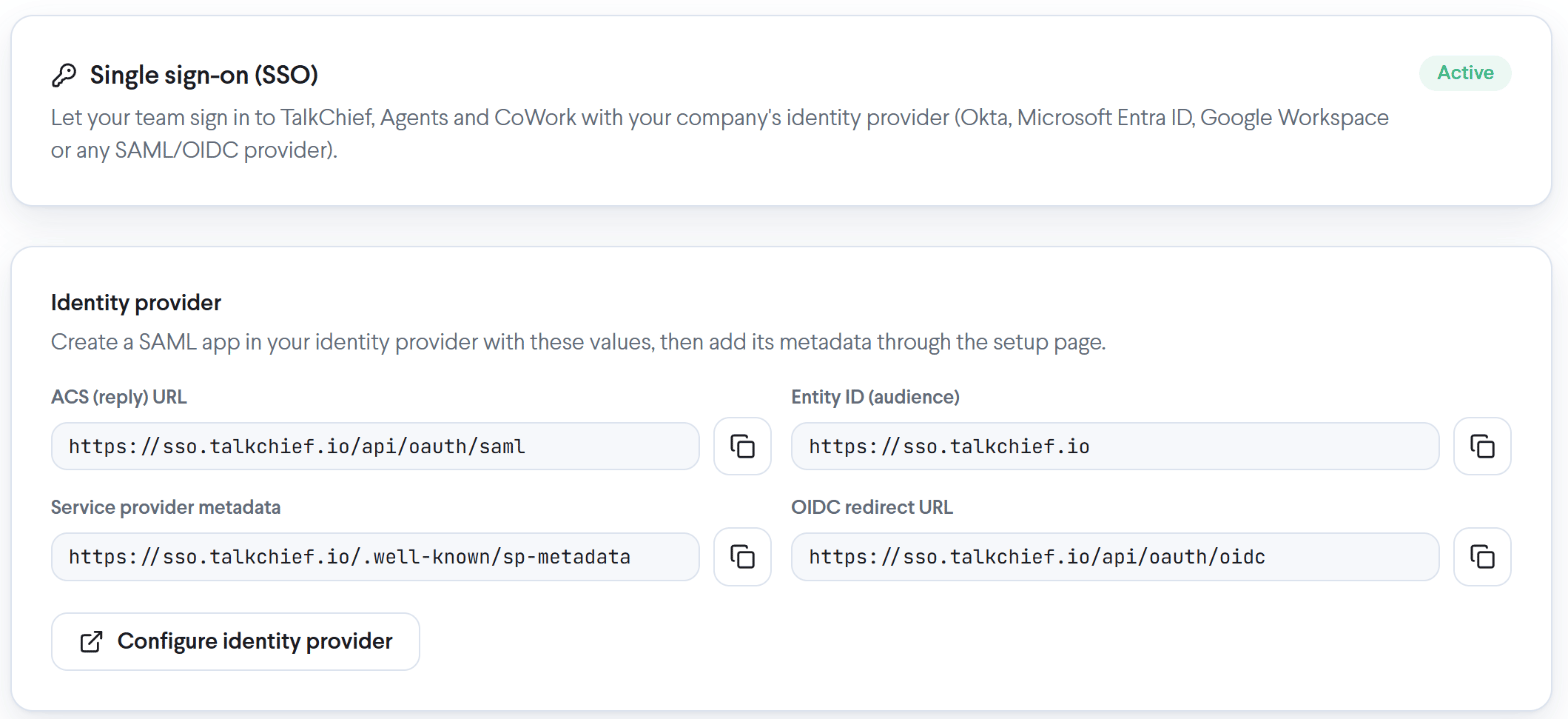
Select Set up single sign-on. The page now shows Identity provider with the values Okta needs. Keep this page open.
Each field has a Copy button.
Step 2: Create the TalkChief app in Okta
1
Create a SAML app
In the Okta Admin Console, go to Applications > Applications and select Create App Integration. Choose SAML 2.0 and select Next.
2
Name the app
Enter an App name, for example
TalkChief, and select Next.3
Enter the SAML settings
Under SAML Settings, set:
- Single sign-on URL: the ACS (reply) URL from TalkChief. Leave Use this for Recipient URL and Destination URL selected.
- Audience URI (SP Entity ID): the Entity ID (audience) from TalkChief.
- Name ID format:
EmailAddress. - Application username:
Email.
4
Sign the requests
Select Show Advanced Settings. Keep Response and Assertion Signature signed with RSA-SHA256. Under Signature Certificate, upload the TalkChief signing certificate from
https://sso.talkchief.io/.well-known/saml.cer, then turn on Signed Requests. Okta then accepts only sign-in requests that really come from TalkChief.5
Add the attribute statements
Under Attribute Statements, add:
Select Next, choose I’m an Okta customer adding an internal app, and select Finish.
6
Assign people
On the app’s Assignments tab, assign the people or groups who should sign in to TalkChief.
7
Copy the metadata URL
On the app’s Sign On tab, copy the Metadata URL.
Step 3: Add Okta’s metadata to TalkChief
1
Open the setup page
Back on Settings > Single sign-on, select Configure identity provider. The identity provider setup page opens in a new tab.
2
Choose Okta
Select Okta SAML SSO. The first steps repeat the Okta settings above; select Next Step until you reach Create SAML Connection.
3
Save the connection
Paste the Okta Metadata URL into Metadata URL and select Save. The connection is listed as Okta SAML with the status Active.
Step 4: Verify your email domain
Only addresses on a verified domain can sign in through Okta. You prove you own the domain with a DNS TXT record.1
Add the domain
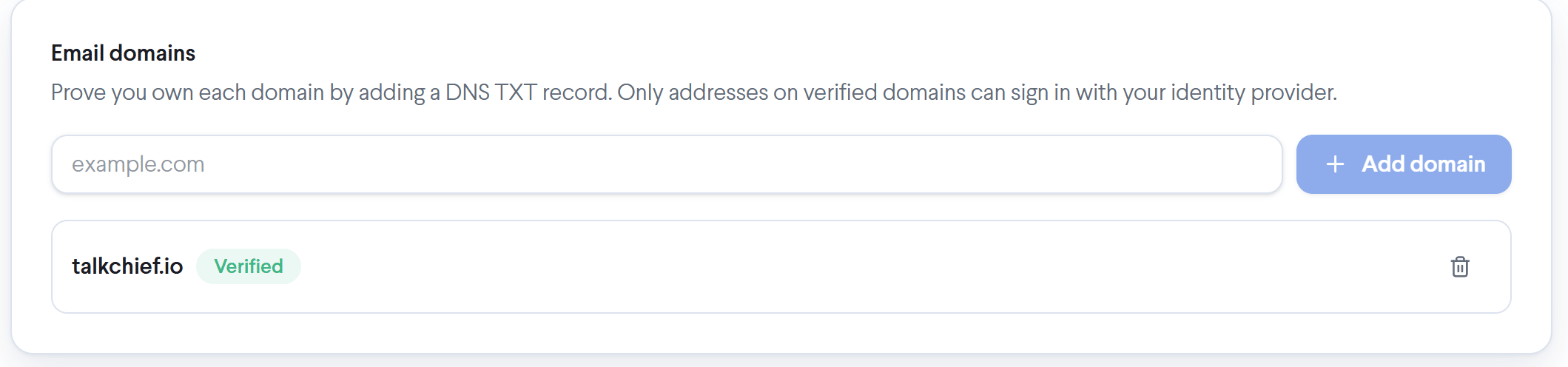
Under Email domains, enter your domain, for example
example.com, and select Add domain. The domain shows Waiting for DNS with a TXT record name and a TXT record value.2
Create the TXT record
In your DNS provider, create a TXT record with that name (for example
_talkchief-verify.example.com) and that value.3
Verify
Select Verify. When TalkChief finds the record, the domain shows Verified. If it says The TXT record wasn’t found yet, wait a few minutes for DNS to update and select Verify again.
Step 5: Choose the sign-in options
Under Sign-in options: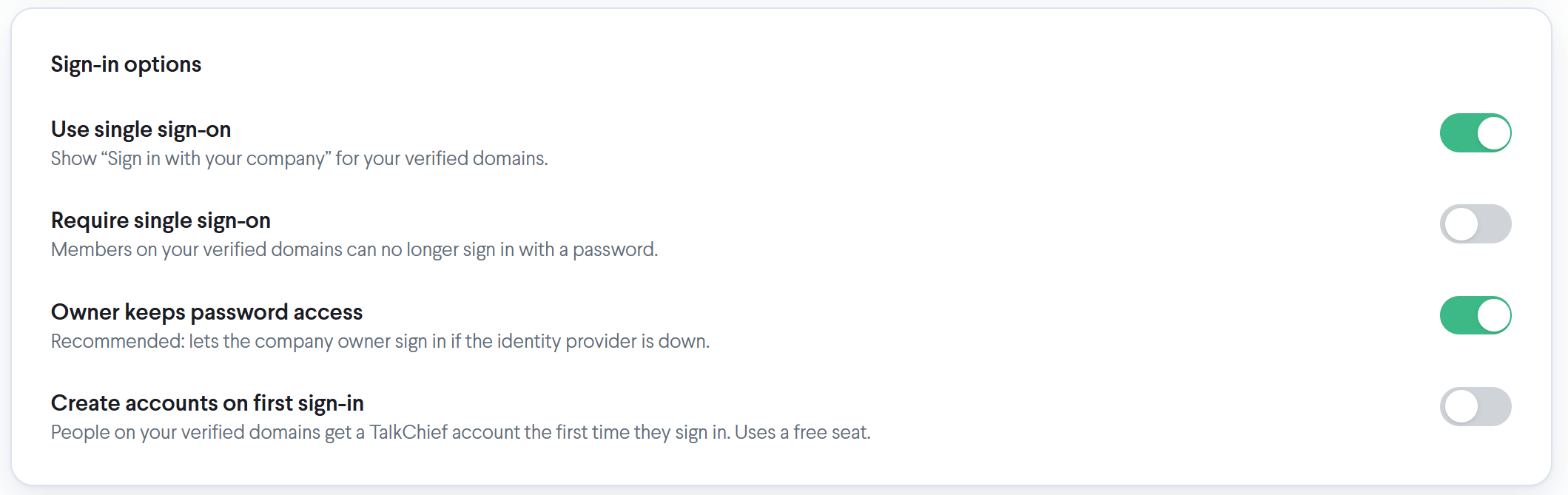
When Use single sign-on is on, the status at the top of the page changes from Not active to Active.
Phones when single sign-on is required
The first time a member signs in through Okta while Require single sign-on is on, TalkChief gives the Web Phone a new calling password automatically, and the Web Phone picks it up on its own. Desk phones and any other phones you set up keep working with their current settings: you don’t need to reconfigure them. Recent activity at the bottom of the page lists setup changes and sign-ins, such as Domain verified, Identity linked and Signed in. Manage single sign-on explains every entry.Invite people on your domain
When you invite a member whose email is on a verified domain, the invitation asks them to sign in with their company account. Its Sign in with SSO button opens the TalkChief login page on the single sign-on step with their email filled in. While Require single sign-on is off, the invitation also offers to set a TalkChief password instead. When it is on, there is no password option. The first time the invited person signs in through Okta, their TalkChief account is ready: their extension and phones are set up as with any invitation.Sign in with Okta
1
Open the login page
Go to the TalkChief login page and select Sign in with SSO, under the Login button.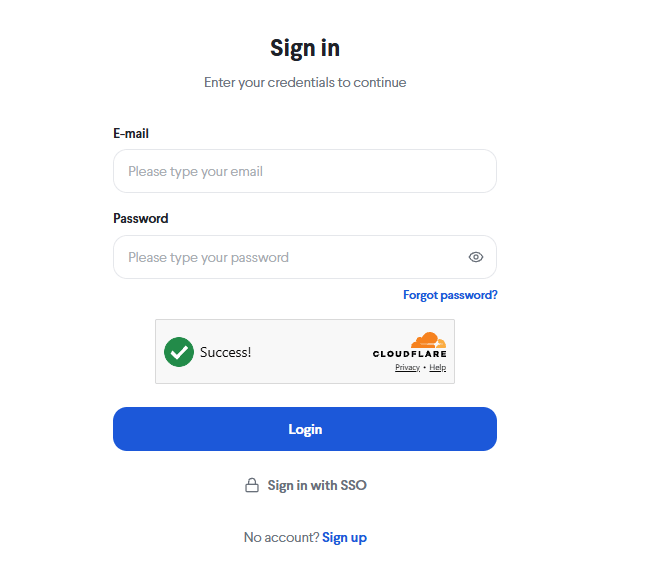
2
Enter your work email
On Sign in with SSO, enter your work email and select Continue. TalkChief sends you to Okta.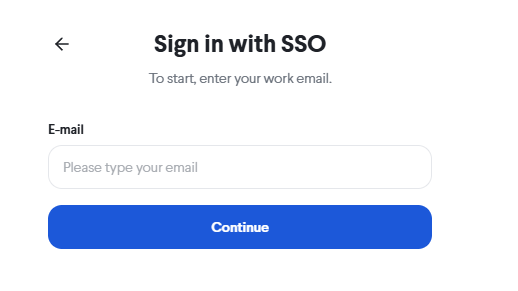
3
Sign in to Okta
Sign in to Okta if you aren’t already. You return to TalkChief, signed in.
Troubleshooting
"Single sign-on isn’t set up for this email."
"Single sign-on isn’t set up for this email."
The email’s domain isn’t verified for SSO, or Use single sign-on is off. Check Email domains and Sign-in options on Settings > Single sign-on, or sign in with your password.
"There’s no TalkChief account for you yet."
"There’s no TalkChief account for you yet."
You are assigned in Okta but have no TalkChief account, and Create accounts on first sign-in is off. Ask your TalkChief admin to invite you or to turn that option on.
"Your company has no free TalkChief seat."
"Your company has no free TalkChief seat."
Create accounts on first sign-in needs a free seat for each new account. Ask your admin to add a seat.
"Your company signs in with single sign-on."
"Your company signs in with single sign-on."
Require single sign-on is on for your domain, so password sign-in is refused. Use Sign in with SSO.
"The sign-in link expired. Please start again."
"The sign-in link expired. Please start again."
The sign-in took too long or was started in another tab. Go back to the login page and start again.
"Company sign-in didn’t complete. Please try again."
"Company sign-in didn’t complete. Please try again."
Okta didn’t finish the sign-in. Check that you are assigned to the TalkChief app in Okta and that its Single sign-on URL and Audience URI match the values in TalkChief exactly.
"Your email domain isn’t set up for company sign-in."
"Your email domain isn’t set up for company sign-in."
Your email domain isn’t verified under Email domains. Ask your admin to add and verify it on Settings > Single sign-on.
"This account can’t sign in right now. Contact your admin."
"This account can’t sign in right now. Contact your admin."
Your TalkChief member is deactivated, so sign-in is refused even though Okta let you through. Ask your TalkChief admin to reactivate you. See Remove someone’s access.