

Single sign-on is available on the Professional plan. To set it up you need a TalkChief admin account, an admin account in your identity provider, and access to your domain’s DNS settings.
What single sign-on does
Once single sign-on is on, people on your verified email domains sign in through your identity provider instead of typing a TalkChief password. Your identity provider confirms who they are and sends them back to TalkChief, signed in. The same company sign-in works for:- The TalkChief web app
- AI Voice Agents
- CoWork on the web
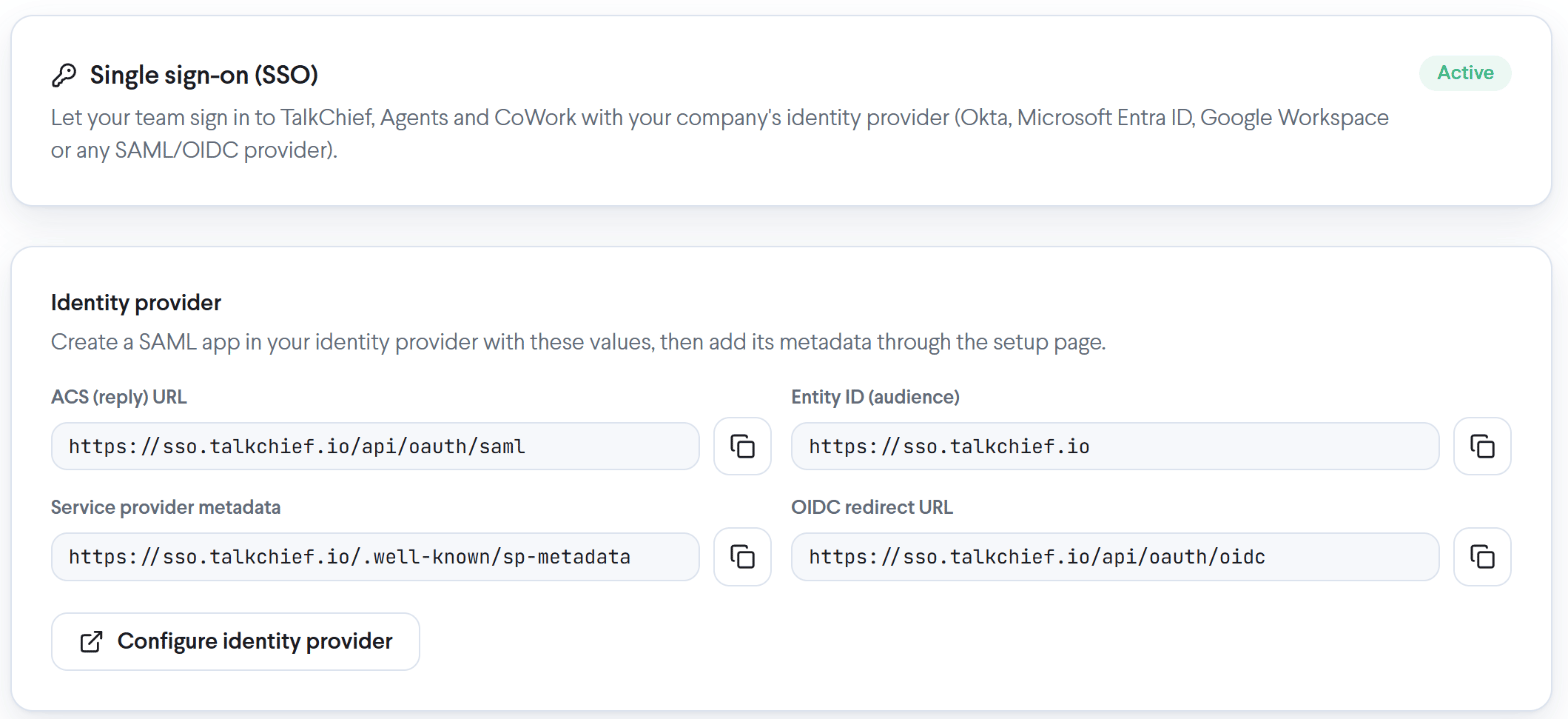
Supported identity providers
You can connect any identity provider that supports SAML 2.0 or OIDC, including:
The Identity provider card on Settings > Single sign-on shows the values your identity provider needs. Each one has a copy button.
Set up single sign-on
Setting up takes five steps. The Okta guide walks through each one with Okta’s screens; other identity providers follow the same order.1
Start the setup in TalkChief
Go to Settings > Single sign-on and select Set up single sign-on. The Identity provider card appears with the values above.
2
Create the TalkChief app in your identity provider
Create a SAML or OIDC app with those values, and assign the people or groups who should sign in to TalkChief.
3
Add your identity provider's details to TalkChief
Select Configure identity provider. The setup page opens in a new tab. Add your identity provider’s metadata there and save the connection.
4
Verify your email domain
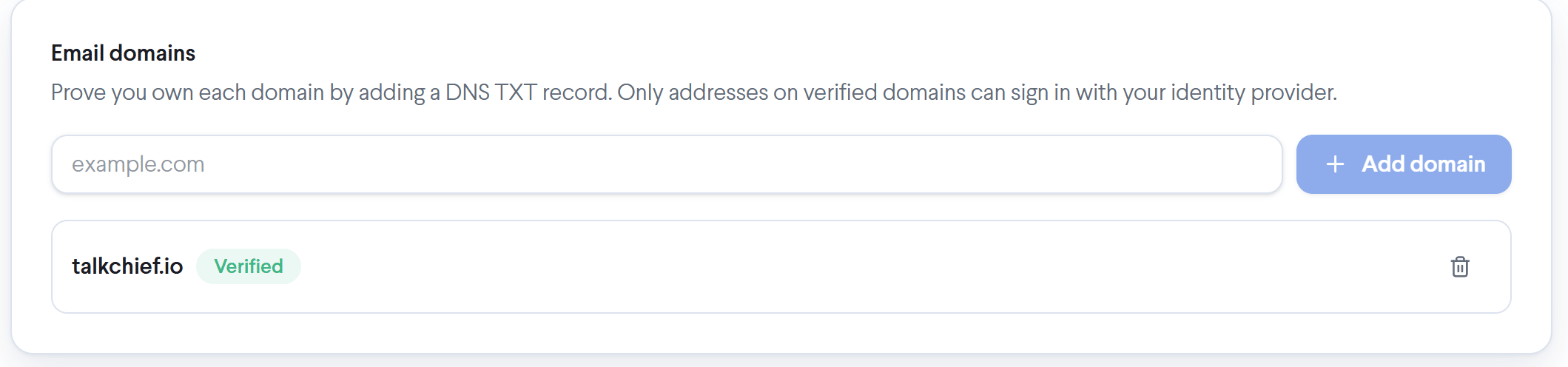
Under Email domains, add your domain and create the DNS TXT record TalkChief shows you. Select Verify. Only addresses on a verified domain can sign in through your identity provider.
5
Turn on single sign-on
Under Sign-in options, turn on Use single sign-on. Test with your own account before you require it for everyone.
Sign-in options
The Sign-in options card controls how single sign-on behaves for your company.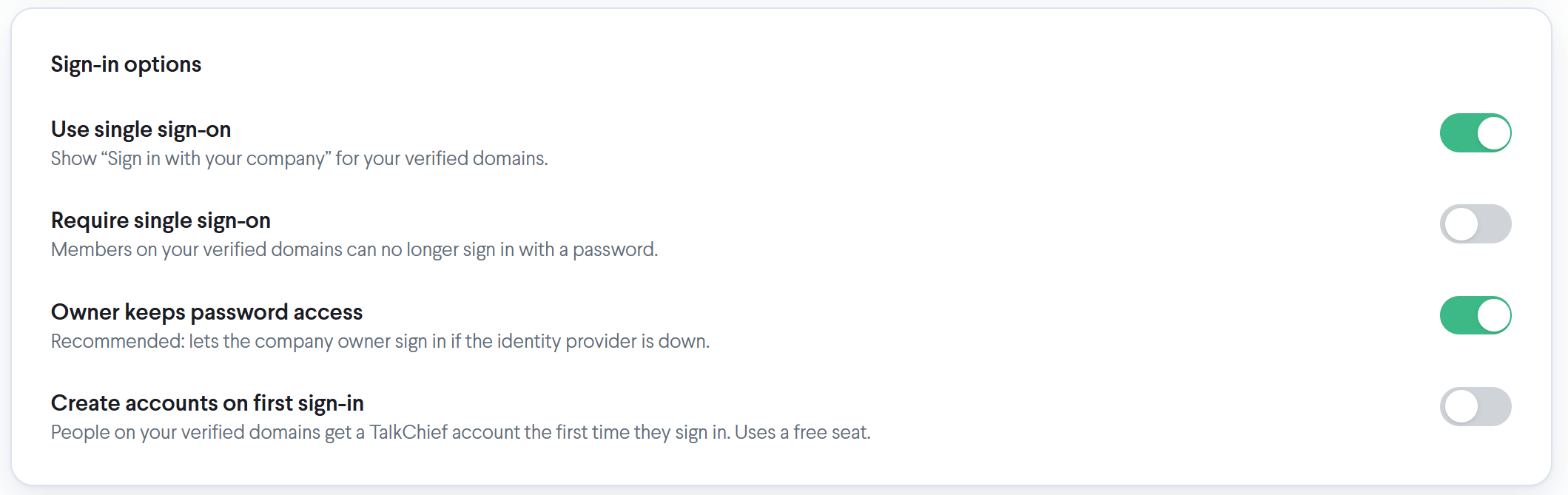
To turn single sign-on off again, see Turn off single sign-on.
How existing members are linked
You don’t need to recreate your team. The first time an existing member signs in through your identity provider, TalkChief links their company account to their TalkChief member by email address, as long as the email is on a verified domain. Their extension, numbers, devices and call history stay as they are. Recent activity on the settings page records this as Identity linked. From then on, the member signs in through your identity provider.Invitations on a single sign-on domain
When you invite someone whose email is on a verified domain, the invitation email asks them to sign in with their company account. Its Sign in with SSO button opens the TalkChief login page on the single sign-on step with their email already filled in.- While Require single sign-on is off, the invitation also offers to set a TalkChief password instead.
- When Require single sign-on is on, there is no password option.
Create accounts on first sign-in
With Create accounts on first sign-in off, only people who already have a TalkChief account, or who have an invitation, can sign in. Anyone else assigned in your identity provider sees: “There’s no TalkChief account for you yet. Ask your TalkChief admin to invite you.” With it on, anyone on your verified domains who is assigned to the TalkChief app in your identity provider gets a TalkChief account the first time they sign in. Each new account uses a free seat on your plan. If no seat is free, the person sees: “Your company has no free TalkChief seat. Ask your admin to add one.”How your team signs in
On the TalkChief login page, Sign in with SSO sits under the password form.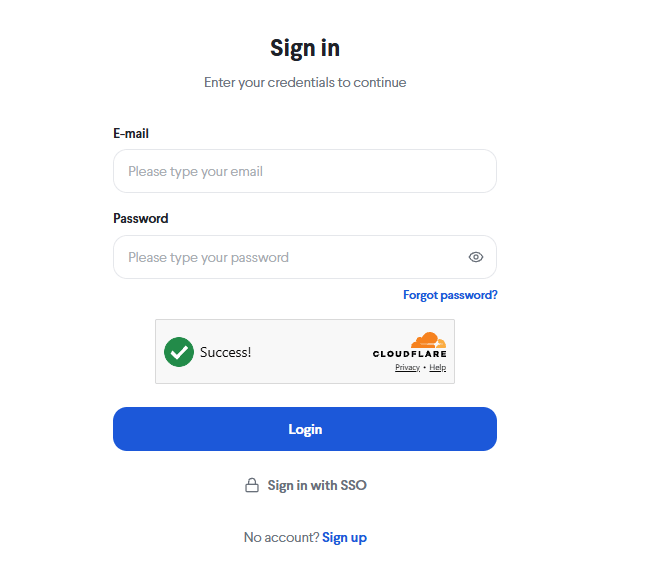
1
Open the single sign-on step
On the TalkChief login page, select Sign in with SSO.
2
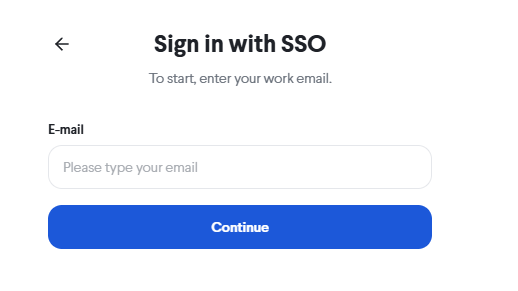
Enter your work email
Enter your work email and select Continue. TalkChief sends you to your identity provider.
3
Sign in with your company account
Sign in to your identity provider if you aren’t already. You come back to TalkChief, signed in.
Next steps
Set up SSO with Okta
Connect Okta over SAML, step by step, with troubleshooting for the sign-in messages.
Manage single sign-on
Turn single sign-on off, remove members, use directory sync, and read Recent activity.